Getting your laptop ready
Installing an editor, git and python
To be able to follow Plotting and Programming in Python online lesson, you would need to install an editor, git and python. Follow the setup instructions and contact any instructors/assistants if you encounter any problems.
We maintain a list of common issues that occur during installation as a reference for instructors that may be useful on the Configuration Problems and Solutions wiki page.
Create a new Anaconda environment
During the abisko course we will be using additional packages that are not part of the main (base) python anaconda environment.
To install additional Python packages/libraries, you need to open a Terminal, and then follow the instructions below.
$ conda env create -f environment.ymlwhere environment.yml is a text file containing the list of packages required for running your analysis.
We provide you with a non exhaustive list of useful packages. Feel free to add new packages:
name: esm-python-analysis

channels:
  - conda-forge
  - bioconda
  - defaults

dependencies:
  - python=3.7
  - numpy >=1.14
  - xarray >=0.10.8
  - pandas >=0.22.0
  - cartopy >=0.16.0
  - matplotlib
  - seaborn >=0.8.1
  - geopy >=1.17.0
  - basemap
  - netcdf4
  - scipy
  - jupyter
  - ipykernel
  - notebook >=5.6.0
  - jupyterlab
  - nc-time-axis
Test your local installation
Starting JupyterLab
Mac OS X
To start the JupyterLab server you will need to access the command line through the Terminal. There are two ways to open Terminal on Mac.
- In your Applications folder, open Utilities and double-click on Terminal
- Press
Command+spacebarto launch Spotlight. TypeTerminaland then double-click the search result or hitEnter
After you have launched Terminal, type the command to activate our new conda environment:
$ conda activate esm-python-analysisThen type the command to launch the JupyterLab server.
$ jupyter labWindows Users
To start the JupyterLab server you will need to access the open Anaconda Prompt.
Press Windows Logo Key and search for Anaconda Prompt, click the result or press enter.
After you have launched the Anaconda Prompt, type the command to activate our new conda environment:
$ conda activate esm-python-analysisThen type the command to launch the JupyterLab server.
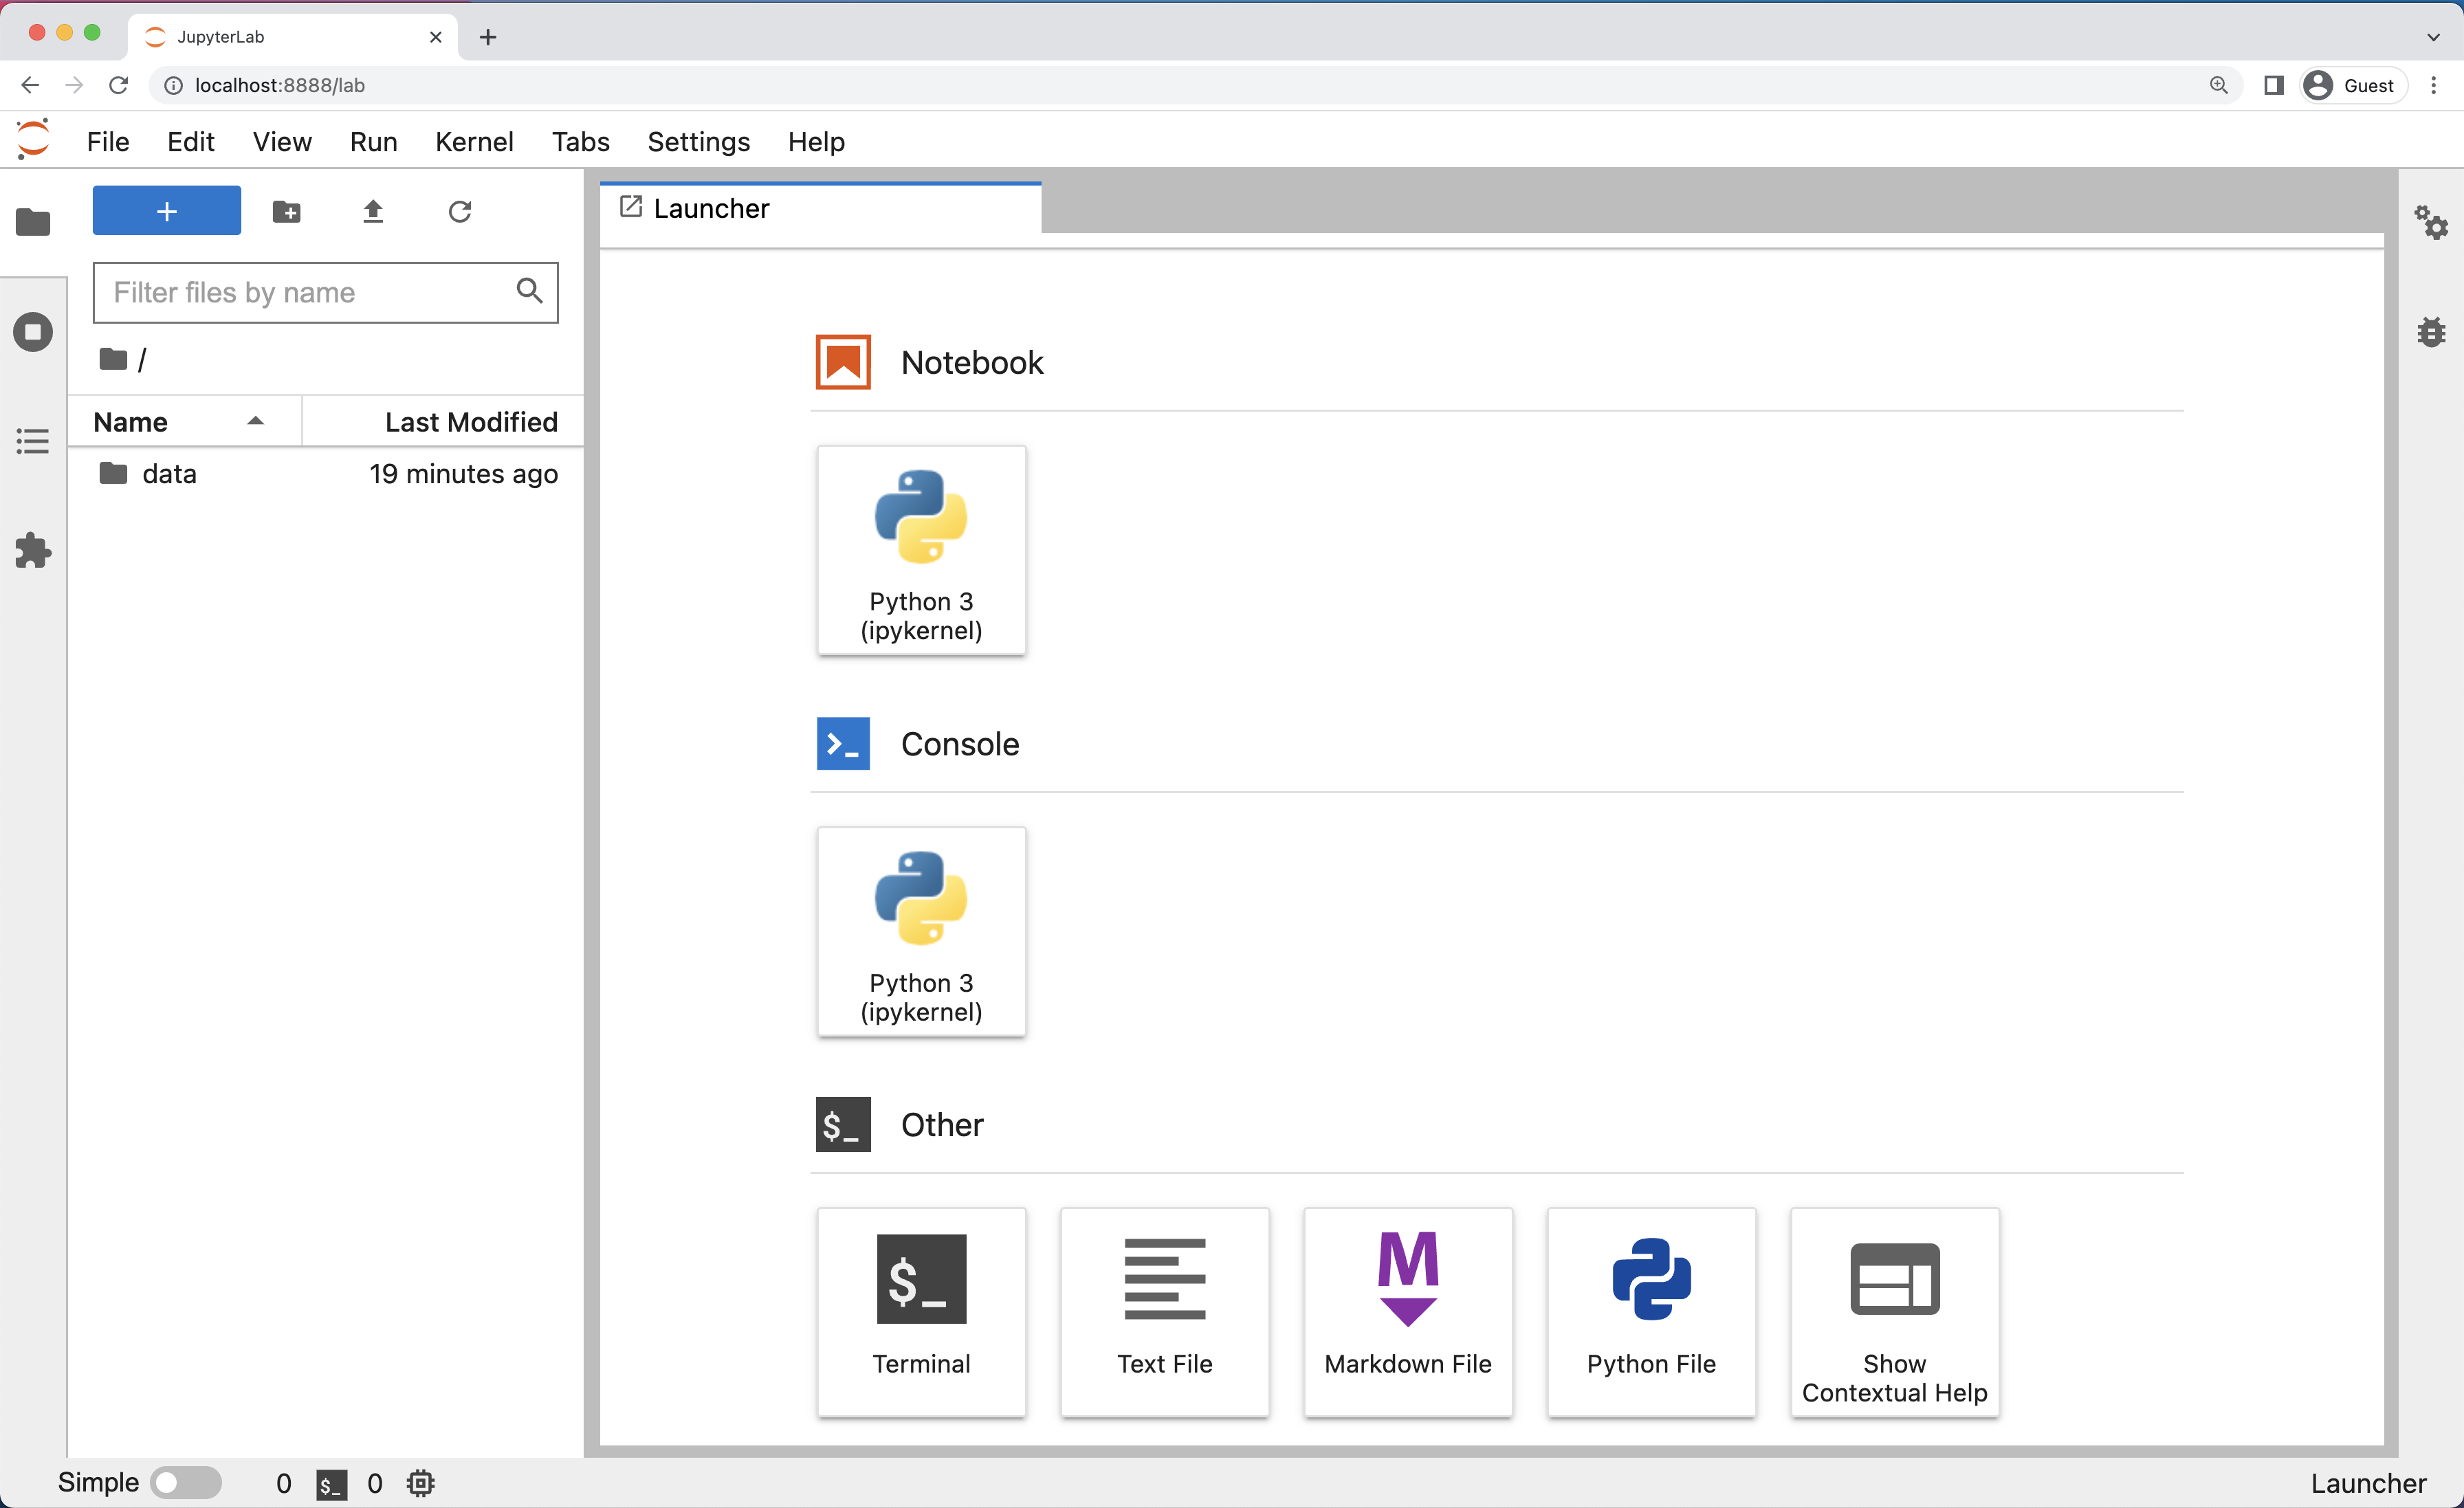
$ jupyter labBelow is a screenshot of a similar JupyterLab landing page to the one that should open in your default web browser after starting the JupyterLab server on wither Mac OS X or Windows.

Menu Bar
The menu bar at the top of JupyterLab has top-level menus that expose actions available in JupyterLab with their keyboard shortcuts. The default menus are:
- File: actions related to files and directories
- Edit: actions related to editing documents and other activities
- View: actions that alter the appearance of JupyterLab
- Run: actions for running code in different activities such as notebooks and code consoles
- Kernel: actions for managing kernels, which are separate processes for running code
- Tabs: a list of the open documents and activities in the dock panel
- Settings: common settings and an advanced settings editor
- Help: a list of JupyterLab and kernel help links
Left Sidebar
The left sidebar contains a number of commonly-used tabs, such as a file browser, a list of running kernels and terminals, the command palette, and a list of tabs in the main work area:

If you move your mouse on the other icon of this left sidebar, a short information is given on its functionality.
If you click on the "running man" or "play" icon, you can see what is currently running on your server and you can click on "SHUTDOWN" to stop a running Python notebook or Terminal.

Create a new python 3 notebook
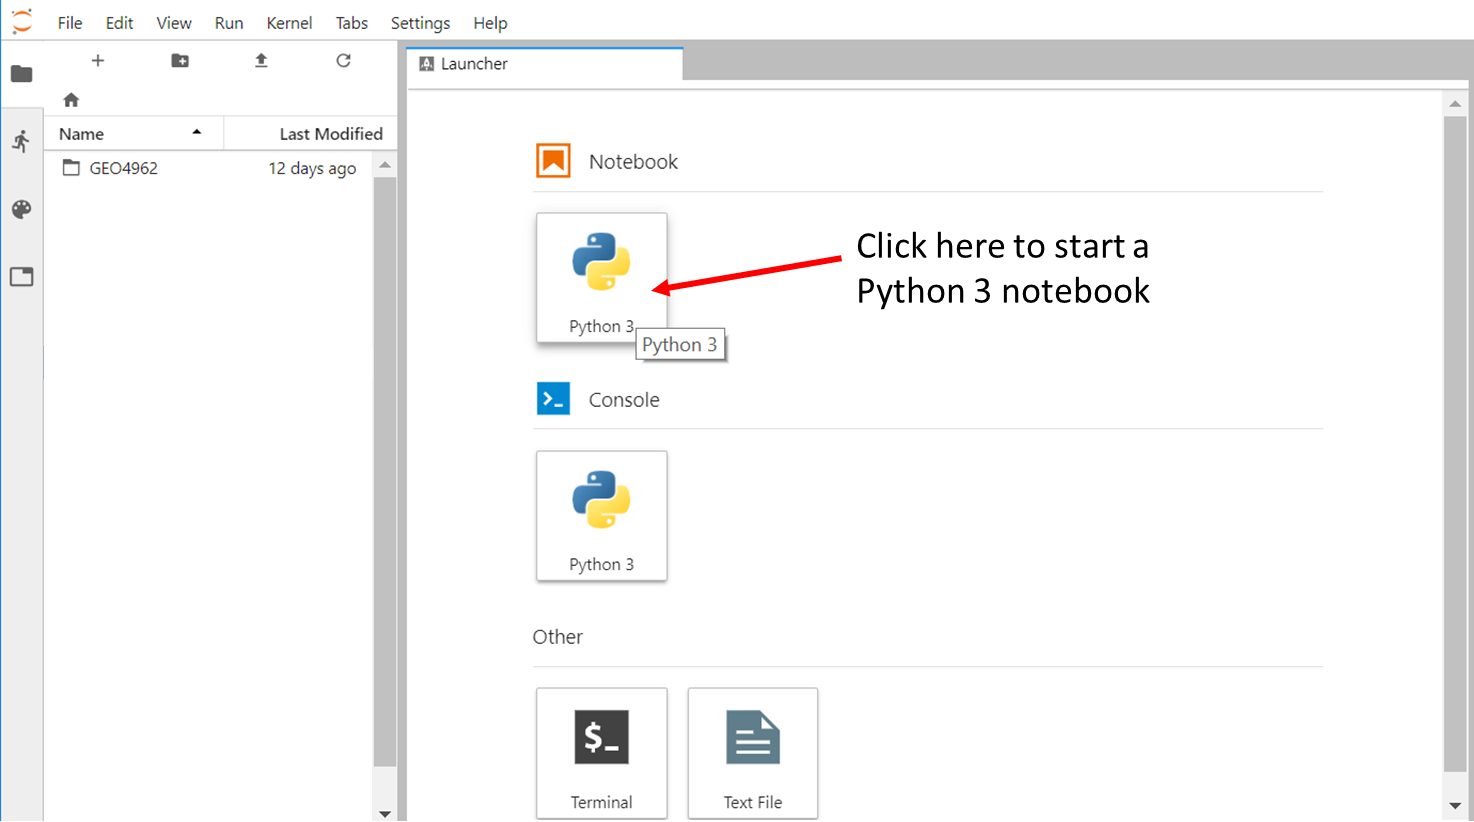
Go back to the File Browser left sidebar tab and in the launcher select Python 3 under the Notebook section:

By default, your new notebook is named as "Untitled.ipynb":
- ipynb is the extension for any Jupyter notebook and you should make sure all your notebook gets this extension (otherwise it is not recognized as a Jupyter notebook)
- you can rename your jupyter notebook with the tab "File --> Rename Notebook...".
Start a new Terminal
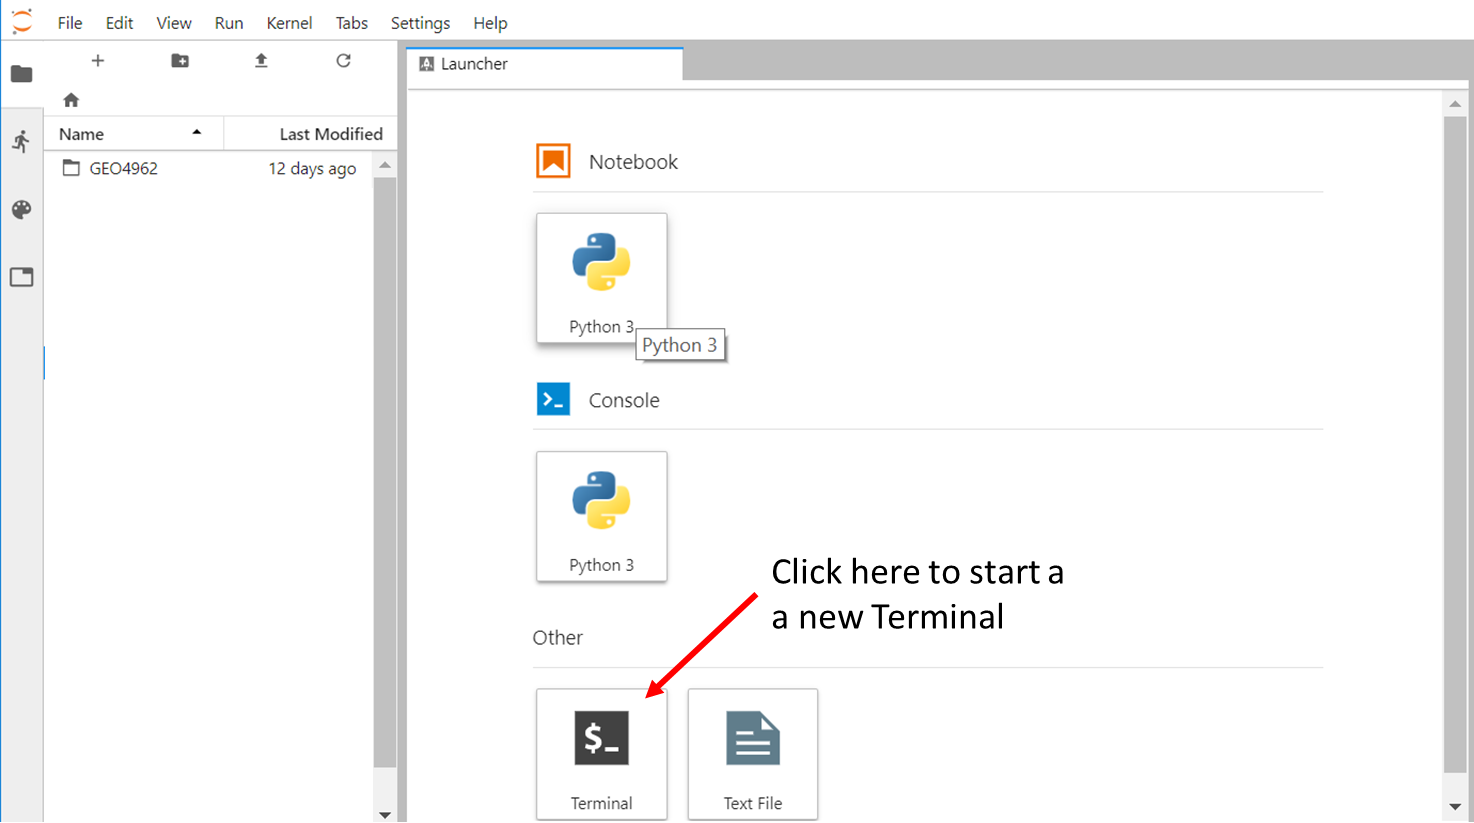
Similarly, you can start a new Terminal by clicking on "Terminal" in the Launcher.

